My experience with the Selpos Mason DIY kit
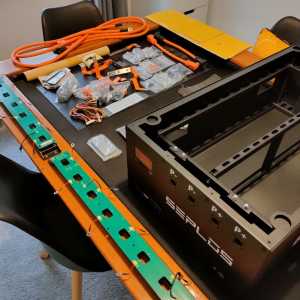
My Seplos kit arrived last week and I've put it all together with some Xuba 280ah cells. I thought I would give some insight and some pictures as to the process and what I found.
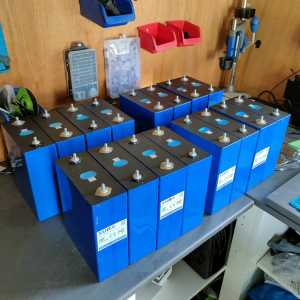
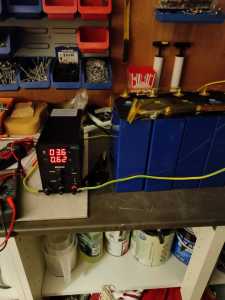
Firstly the cells came first, they were from Xuba and cost $2112 USD delivered and duty paid to the UK. These were then top balanced with a little bench power supply to 3.663V. This took AGES. Nearly two weeks end to end. The cells also came with the bus bars and nuts. They came well packaged and I don't have any complaints.
Cells unpacked and top balanced.
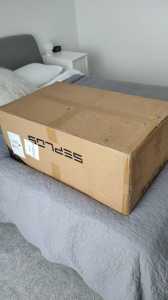
The kit arrived well packaged (on the outside. On the inside everything was just kind of thrown in there. The bags were zip tied onto a central strut and one bag had broken open. This is something I believe has been experienced by others too.
From my understanding Seplos is now putting all these bits in a sealed box. That's great going forward, less so for me. That said, very few bits were actually loose.Box arrived and opened up
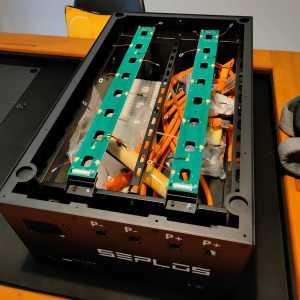
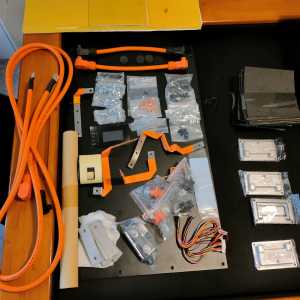
Below is the full kit unpacked. There is NO INSTRUCTION manual. You get a lot of bits in the kit. To summarise you get the BMS, BMS Fuse, flexible metal plates for the BMS so it can reach the batteries, some heat sink blu tack stuff, tonnes of screws, nuts and bolts, bus bars (aluminium), front plate + and - connectors, EVA tape for between the batteries and for under the balancer and some hard fibre board to electrically insulate the case. The case is also built like a bomb shelter. I also ordered some cables and a BMS connector cable (which didn't arrive) - more on this part later.
Everything unpacked
The build was frankly very straight forward. I didn't really need the instructions but I had to ask Seplos to send them to me. I did use a couple of YouTube videos to make sure I didn't do anything too wrong. 90% of the work is building the BMS and the final 10% is putting in the cells. All in all I would say end to end this took me about 2-3hrs. I could easily do a second one in way less time. As a note on the ease I built the bulk of this with a single screw driver and allen key. I didn't use a torque wrench until the end, when I tightened everything up.
The BMS fuse is a bit… meh. I might add my own in line fuse in the future. If this one goes, that's it, its a one shot burn through job.
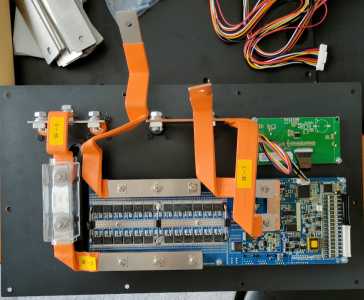
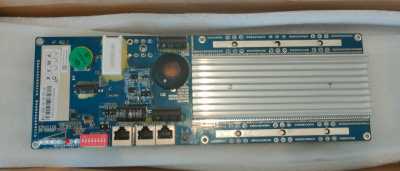
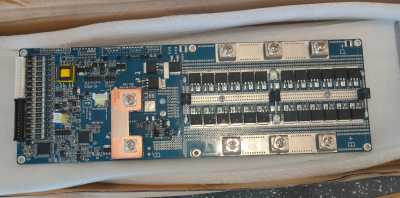
The BMS assembled.
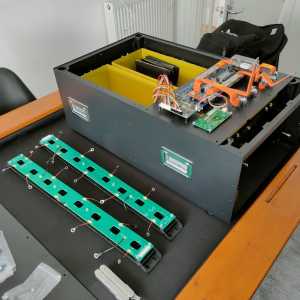
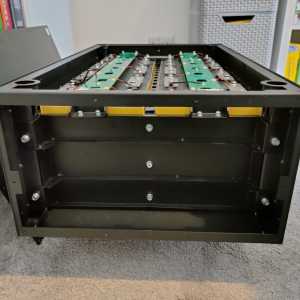
Everything assembled, waiting for the cells
The cells were very easy to put in. Pop the EVA foam on them and slide them in. They also tighten up a huge amount and get very snug. With the cells in, the battery weighs the same as a small car. I put mine on a small dolly and did the final assembly on the floor. Lifting this thing would be a small hernia in the making. Its over 100kg.
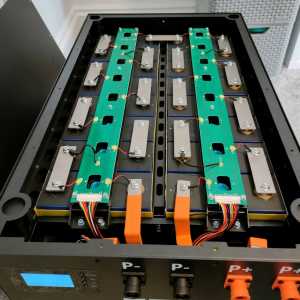
Cells in and the front plate tightened up. The top plates for the BMS was simple to install, 4 screws.
Getting the cells in and connecting them was very simple. Seplos provides a battery layout diagram which is simple and also makes perfect sense. Everything fit well. They did provide little copper washers for the top of the cells. This is a complaint. They were 3 short in the bag. Therefore some cells have them and some don't. I made sure that all cells were matched e.g. copper touching copper under the bus bars, but its an annoyance it was short. I know some people didn't bother with them at all, but I added them anyway. Nuts were torqued to 8Nm on the front plate and 5Nm on the cells. I do have a measured torque wrench so this wasn't an issue. However if you had no wrench you could probably get away with a screw driver torque wrench. I did them by hand by first and almost all of them were at 5Nm when I used the measure wrench.
BMS installed
Finally I checked the cell voltages on the ribbons before I connected the BMS. Everything was fine so I added the BMS front plate, connected up and tightened what needed to be tightened. I would suggest you add the ribbons to the BMS and connect to the cells vs connect to cells and then to the BMS. The space is too tight in behind the BMS to get your hands in easily.
Last thing was to connect to the BMS on my laptop to set the cell size to 280ah (default is 200ah). I couldn't do this. I ordered the cable with the kit and Seplos forgot to put it in. Frankly this SHOULD come with it. its $25 from them (which is too much anyway). The kit was $600 plus shipping, it should be included. I tried my pylontech cable... didn't work. Tried a normal ethernet... didn't work. In the end I had to buy a USB adaptor and build my own ethernet cable with the pin out they sent me. I really shouldn't need to do this - just chuck in the cable guys.
Overall this is a very easy kit and I would build another. It cost under $3k USD delivered and tax paid for 15kwh of storage. Is there more work than a normal server rack, yes. Is it a hassle to build? No. Its at best an afternoon of work for even an unskilled person. I would give it 4/5.
Respect @batalto, and thanks posting. From what you’ve described it seems straightforward and amazing value for money. What’s the next step? Will you connect it to the house?
Get a copy of The Ultimate Guide to Heat Pumps
Subscribe and follow our YouTube channel!
@editor yes I'm going to install a new battery inverter and use it with that. My issue is I can't seem to get an installer to actually do the work. So I'm a little stuck at the moment with a battery I can't actually use... Very annoying.
@batalto, is that due to installer unavailability or unwillingness?
Get a copy of The Ultimate Guide to Heat Pumps
Subscribe and follow our YouTube channel!
@editor I think it's both frankly. I think all the other work is probably much more profitable than installing a single inverter. It's a small job but I imagine it's a whole day when the work is probably a couple of hours max. I might just install myself
@batalto, have you made any progress in getting your system fitted?
Get a copy of The Ultimate Guide to Heat Pumps
Subscribe and follow our YouTube channel!
@editor will be fitted on the 17th as well as some modifications to my ASHP - removal of the Low Loss Header and swapping to controller rather than the Nest. Hoping to get my COP up to 3.6+ from the current 3
I've had a few issues with my battery over the last few days. Essentially it has kept shutting down randomly. After speaking to Seplos and connecting to the BMS they have determined there is a loose connection on the battery wiring. I had to download the error logs and send them over to them.
I'll need to open it up today to check everything. Even though it's been annoying I'm impressed with the customer support. I'm also annoyed with myself as I'm sure I torqued everything to 5Nm as required.
I've adjusted the torque and I am still getting random shutdowns. Back to Seplos we go. I fear I might just have a dud BMS. Time will tell
@korwraith a new BMS is on the way. It'll be about a week. I think they exhausted the potential issues and came to the conclusion it's a BMS problem
- 26 Forums
- 2,396 Topics
- 54.3 K Posts
- 370 Online
- 6,077 Members
Join Us!
Worth Watching
Latest Posts
-
RE: New Mitsubishi Ecodan 11.2kW installation - L9 errors and maybe more
OK thats great, so basically the mixing valve is disabl...
By JamesPa , 3 minutes ago
-

RE: Running from backup generaor in powercut?
Our DNO has updated our restore time to 21:00, after th...
By Mars , 3 minutes ago
-
RE: ASHP Energy Consumption: Aira 12kW heat pump
This would help, electric showers are very power hungry...
By Grantmethestrength , 26 minutes ago
-
RE: Recommended home battery inverters + regulatory matters - help requested
My most recent certificate says my supply is TN-S, eart...
By JamesPa , 38 minutes ago
-

RE: Fan is clipping ice build up from the front of unit.
Not sure if this helps, but the probes look like this. ...
By Mars , 55 minutes ago
-
RE: Help me keep the faith with my air source heat pump installation
@adamk I'm observing my own system at low temperatures ...
By dr_dongle , 4 hours ago
-

RE: Free Ecoheat Heat Pump Install
@deltona Yes older houses are problematic like that, bu...
By bontwoody , 24 hours ago
-
RE: Radiator sizing sanity check
As I mentioned early on the cost of supplying and fitti...
By JamesPa , 1 day ago
-
RE: Advice for a novice on Mitsubishi Ecodan 6kW
I hadn't spotted that there were two pumps in the UFH (...
By JamesPa , 1 day ago
-
RE: Setback savings - fact or fiction?
Never assume it makes an ass of u and me! You need the...
By JamesPa , 1 day ago
-
RE: Electricity price predictions
Great point, one of the key ones in my chat with Octopu...
By Batpred , 2 days ago
-

RE: New Fogstar 15.5kWh upright solution
Let me point out that there are many Chinese suppliers ...
By Transparent , 2 days ago
-
RE: Weather compensation- why you should use it
@majordennisbloodnok — The Two Ronnies Mastermind sketc...
By cathodeRay , 2 days ago
-
Just realised that this image of the cylinder cupboard ...
By Sheriff Fatman , 2 days ago
-

RE: Rodents! A word of warning for heat pump owners
Two thoughts: 1: Let's ask @david-s if Primary Pro in...
By Transparent , 2 days ago
-
RE: Solis S6-EH1P8K-L-PLUS – Why I Chose It and What I’ve Learned So Far
In the diagram below, I describe my understanding of th...
By Batpred , 2 days ago
-
I need to have a look out for it. I know IBM feeds some...
By Batpred , 2 days ago
-
-
RE: Daikin Atherma ASHP Cycling 6 Times an Hour?
Thanks for your reply. Yes that's a good idea to try a...
By John Marshall , 2 days ago
-

RE: Hot water heating in parallel with space heating
An external heat exchanger would need a pump which woul...
By bontwoody , 2 days ago

